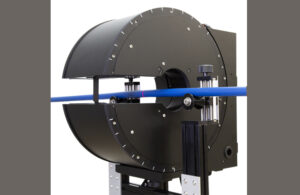
The system enables manufacturers of high-specification tube, pipe, and wire and cable to detect surface defects during manufacturing and change processes accordingly. Intended uses include measuring flaws and outside diameter and ovality in medical tubing.
FlawSense provides a single instrument measurement, with data visualized in TotalVu, LaserLinc’s graphical user interface.
The technology behind FlawSense consists of at least three laser sources symmetrically disposed about the tube or pipe or wire. Each laser beam passes through optics to project a linear array of light and a CMOS array sensor collects light reflected from the product’s surface. The sensor array provides multipoint measurements of triangulation across the field of view of the laser and allows computation of a profile using algorithms and point cloud data manipulation.
FlawSense’s ultra-high-resolution laser technology can detect flaws only 5 microns across, according to LaserLinc.
Said LaserLinc: “Tolerances need to be extremely precise in medical tubing where such devices are used in invasive surgery and must pass unhindered through a patient’s vein for example. In short, any application where a product is deployed in highly demanding applications will benefit from in-line inspection during manufacturing.”
